How to Install and Maintain the Right Cabinet Fan for Your Needs

Choosing and maintaining the right cabinet fan protects your equipment from overheating and inefficiency. Poor cabinet cooling can lead to hot spots and wasted energy. For example, a single unprotected opening of about 12" x 6" can reduce system cooling capacity by 1 kW, while knowing the kilowatt draw per cabinet helps you determine the correct airflow. When you manage airflow effectively, you can achieve up to 16% higher cabinet load density and save energy. With the right approach, you keep your devices safe and running smoothly.
Key Takeaways
Choose a cabinet fan that matches your equipment's heat output and cabinet size to keep devices cool and safe.
Install intake vents at the bottom and exhaust vents at the top to let hot air escape naturally and improve cooling.
Regularly clean and inspect your cabinet fan and vents to prevent dust buildup and maintain strong airflow.
Use filters and positive air pressure to keep dust out and protect sensitive equipment inside the cabinet.
Follow manufacturer instructions and safety guidelines during installation and maintenance to ensure long-lasting performance.
Why Cabinet Cooling Matters
Risks of Overheating
You need to understand the dangers that come with poor cabinet cooling. Overheating can cause your equipment to fail or even become permanently damaged. Many devices, especially AV equipment, react badly to temperature changes. High humidity makes things worse by increasing the risk of failure. If you ignore regular HVAC maintenance, you allow heat to build up inside your cabinet. This can lead to several problems:
Devices may feel hot to the touch.
Unexpected shutdowns can occur.
Fans might run louder than usual.
You may notice a burning smell.
Thermal expansion and contraction can damage internal parts.
Electrical signals can become distorted.
Materials inside the cabinet can degrade faster.
Poor ventilation traps heat, raising the risk of fire and costly repairs. You can prevent these issues by combining passive cooling methods, like natural airflow, with active solutions, such as fans or air conditioners. Placing intake fans at the bottom and exhaust fans at the top helps heat escape efficiently. Regularly checking the temperature inside your cabinet lets you spot problems before they cause damage.
Benefits of Proper Airflow
Proper airflow keeps your equipment safe and running at peak performance. Research shows that managing airflow inside cabinets lowers the temperature at the air inlet and prevents hot spots. The following table highlights how different airflow strategies affect cabinet cooling:
Airflow Strategy | Inlet Temperature | Air Supply Efficiency | Key Benefits |
|---|---|---|---|
Default (no containment) | High, uneven, hot spots | ~65.69% | Hot and cold air mix, local hotspots, inefficient cooling |
Cold Aisle Containment (CAC) | Uniform, ~20°C | 85.57% | Lowers inlet temperature, improves cooling efficiency |
Hot Aisle Containment (HAC) | Uniform, ~20°C | 90.25% | Best thermal environment, reduces energy use |
Backplane Air Conditioning | Uniform, ~21.5°C | N/A | Even cooling, meets server requirements |
You can see that using containment strategies or backplane air conditioning creates a stable environment. This reduces the risk of overheating and extends the life of your equipment. Good airflow also means you spend less on repairs and energy.
Cabinet Fan Selection
Assessing Needs
You need to start by understanding your cabinet’s cooling requirements. The right cabinet fan depends on several factors, including the size of your cabinet, the amount of heat your equipment generates, and the environment where you place the cabinet. Follow these steps to assess your needs:
Measure the heat load of your equipment in watts. Most devices list their power consumption on the label or in the manual.
If you have heat output in BTU/hr or tons, convert it to watts. Use the formula: BTU/hr × 0.293 = watts.
Add up the heat output from all sources inside the cabinet. Include IT equipment, power supplies, lighting, and even people if they work near the cabinet.
Multiply the total heat load by a safety factor (usually 1.5 to 2) to cover peak loads and unexpected increases.
Consider the type of equipment and the environment. Some devices need tighter temperature and humidity control.
Make sure your cooling solution can handle both normal and peak heat loads.
Tip: Always check the energy efficiency rating and ventilation requirements for your setup. Reliable cooling protects your investment and keeps your equipment running smoothly.
Key Features
When you compare cabinet fan options, you should look for features that match your needs. Product manuals and datasheets provide important details. Here are the key features to check:
Airflow capacity (measured in CFM)
Noise level (measured in dBA or sones)
Static pressure rating
Power consumption and operating voltage
Mounting positions (horizontal or vertical)
Fan bearing type (such as dual ball for longer life)
Certifications (UL, CE, RoHS)
Operating temperature range
Warranty period
You can use the following table to help you review product specifications:
Specification Category | Details / Examples |
|---|---|
Dimensions | Inlet/outlet size, height, depth, weight |
Application | Exhaust, supply, recirculate air |
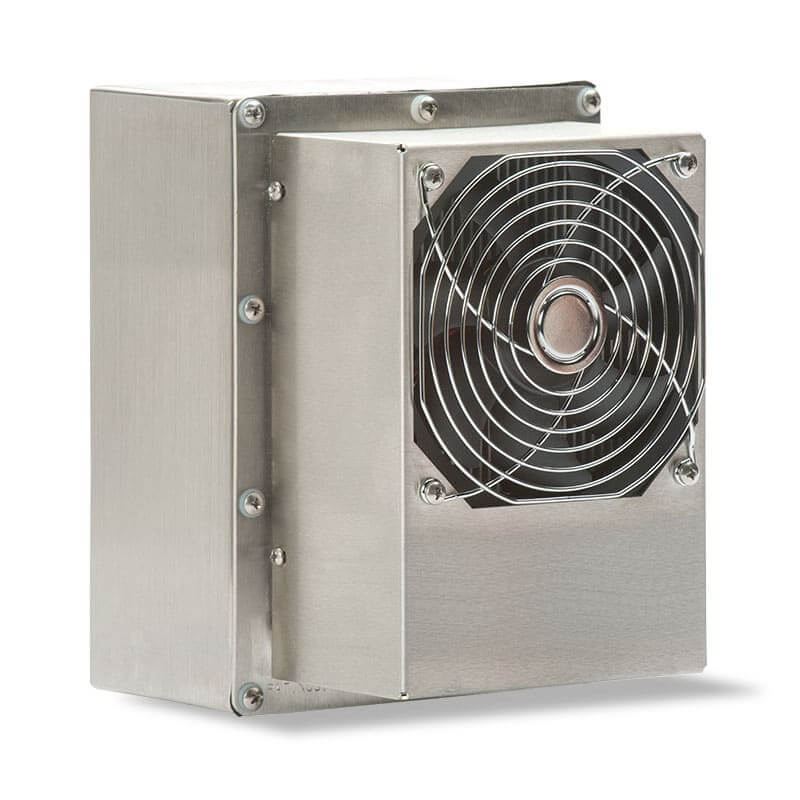
Construction Features | Galvanized steel housing, access panels |
Motor Information | Voltage, RPM, thermal protection |
Performance Metrics | Airflow (CFM), noise (dBA), static pressure |
Certifications | UL, CE, RoHS, AMCA |
Warranty | 3 Years |
Mounting Positions | Horizontal, vertical |
Note: For media cabinets or computer enclosures, choose a cabinet fan with quiet operation and a long service life. This reduces distractions and maintenance.
Sizing Tips
Selecting the correct size for your cabinet fan ensures efficient cooling. You can use simple calculations and online tools to help with this process.
Calculate the volume of your cabinet: length × width × height (in feet).
Decide how often you want the air inside the cabinet to be replaced. For most electronics, aim for a complete air change every 2-4 minutes.
Use the formula:
CFM = Cabinet Volume / Minutes per Air ExchangeFor example, if your cabinet is 8 cubic feet and you want an air change every 2 minutes, you need a fan rated for at least 4 CFM.
If your equipment generates a lot of heat, use a more detailed method. Calculate the total heat load in watts, then use a fan sizing calculator to find the required airflow based on your target temperature rise.
Always add a safety margin to your calculations to account for unexpected heat spikes.
Tip: Many manufacturers and websites offer CFM calculators and charts. These tools help you match your cabinet size and heat output to the right fan model.
A properly sized cabinet fan keeps your equipment cool, quiet, and protected from overheating.
Cabinet Fan Installation

Tools and Preparation
Before you begin, gather all the necessary tools and materials. Having everything ready will make the installation process smoother and safer. You will need:
Measuring tape
Pencil or marker
Drill with appropriate bits
Jigsaw or hole saw (for vent openings)
Screwdriver set
Level
Safety goggles and gloves
Mounting hardware (usually included with your cabinet fan)
Duct tape or sealant (for airtight connections)
Vacuum or brush (for cleaning up debris)
Tip: Always read the manufacturer’s instructions for your specific cabinet fan model. This ensures you follow any unique requirements and maintain your warranty.
Vent Placement
Proper vent placement is essential for effective cooling and energy efficiency. You should mark and cut intake and exhaust vent holes in locations that support natural airflow patterns. Place intake vents at the bottom or front of the cabinet. Position exhaust vents at the top or rear. This setup follows the principle that heat rises, allowing warm air to escape efficiently.
Cabinets with double wall construction and tight seals help maintain insulation and reduce noise.
Use doors with gaskets to improve thermal and acoustic performance.
Install filter slots that can hold at least 2-inch thick filters for better dust protection.
Make sure filter assemblies have gaskets and sealants to prevent air bypass.
Follow ASHRAE standards for ventilation and thermal comfort to ensure proper airflow.
You should also avoid blocking airflow paths with equipment or cables. Place return vents near areas where dust and particulates collect most, such as near workstations or high-traffic zones. This helps control air quality and keeps your cabinet fan working efficiently.
Mounting Steps
Follow these steps to mount your cabinet fan securely:
Mark the mounting location on your cabinet, ensuring it aligns with your vent openings. Use a level to keep everything straight.
Drill pilot holes at the marked spots. This prevents the wood or metal from splitting.
Cut the intake and exhaust vent holes using a jigsaw or hole saw. Wear safety goggles and gloves during this step.
Attach the cabinet fan using the provided mounting hardware. Secure it to solid backing or studs for stability.
Tighten all fasteners to prevent vibration and noise.
Connect the electrical wiring. Always turn off power at the circuit breaker before working with wires. Follow the manufacturer’s wiring diagram.
Seal any gaps around the fan and vent openings with duct tape or sealant. This step prevents air leaks and improves efficiency.
Test the fan by restoring power and checking for proper operation. Listen for unusual noises and feel for airflow at the exhaust vent.
Clean up the installation area and ensure all tools are removed.
Note: Always comply with local building codes and safety standards. Use fire-rated materials and rigid metal ducts for better airflow and safety.
Airflow Direction
Setting the correct airflow direction is crucial for optimal cooling and dust control. Intake fans should pull cool air in from the bottom or front. Exhaust fans should push warm air out from the top or rear. This arrangement uses the natural movement of heat and supports laminar airflow, which helps avoid hot spots.
Empirical studies and airflow models show that maintaining positive air pressure inside the cabinet can help control dust and contaminants. Adjusting fan speed and direction allows you to optimize performance for your specific environment. Particle Image Velocimetry (PIV) and computational fluid dynamics (CFD) models confirm that proper fan direction and pressure setups reduce infiltration and improve cooling efficiency.
Tip: For clean environments, use filtered intake fans to keep dust out. Positive air pressure helps prevent unfiltered air from entering through small gaps.
A well-installed cabinet fan with the right airflow direction will keep your equipment cool, extend its lifespan, and reduce maintenance needs.
Maintenance and Troubleshooting
Cleaning
You need to keep your cabinet fan and its surroundings clean to ensure reliable performance. Start by disconnecting the power before cleaning any ventilation components. Remove dust and debris from intake and exhaust areas using a vacuum with a HEPA filter or compressed air. Wipe down surfaces with a lint-free cloth dampened with a suitable cleaning agent. For best results, follow a top-to-bottom and dry-to-wet cleaning sequence. This method prevents cross-contamination and helps you spot any hidden buildup.
Cabinet Component | Cleaning Agent | Frequency | Special Tips |
|---|---|---|---|
Exterior surfaces | 70% Isopropyl Alcohol (IPA) | After each use | Avoid excess moisture near edges |
Interior surfaces | Hydrogen peroxide-based cleaner | Weekly | Dry completely before closing cabinet |
Hardware | Mild detergent solution | Weekly | Use soft cloth to avoid scratches |
Gaskets and seals | Gasket cleaner | Monthly | Inspect for cracks or wear after cleaning |
Ventilation components | Compressed air + IPA wipe | Monthly | Disconnect power before cleaning |
Tip: Annual deep cleaning helps prevent dust buildup and keeps airflow smooth. Always let all parts dry before restoring power.
Inspection
Regular inspections help you catch problems early. Perform a quick visual check every day. Look for dust, debris, or signs of wear around the fan and vents. Listen for unusual noises when the cabinet fan runs. Each month, clean pulleys, blades, and filters. Check belt alignment and tension if your system uses belts. Lubricate moving parts and inspect dampers for smooth operation. Once a year, clean wiring, ductwork, and insulation. Document each maintenance task with the date and any issues you find. This record helps you track performance and plan future maintenance.
Common Issues
You may encounter a few common problems with your cabinet fan. If you notice reduced airflow, check for clogged filters or blocked vents. Unusual noises often mean loose fasteners or worn bearings. Air leaks around the cabinet can lower cooling efficiency. Make sure no debris sits within five inches of intake or exhaust areas. If the fan does not start, verify the power supply and wiring connections. For persistent issues, consult the manufacturer’s manual for troubleshooting steps.
Note: Following a daily, monthly, and annual maintenance schedule keeps your cabinet fan running efficiently and extends its lifespan.
You can protect your equipment and boost efficiency by choosing the right cabinet fan, installing it with care, and following a regular maintenance routine. Regular cleaning and inspections prevent dust buildup, reduce energy use, and extend the life of your fan.
Maintenance programs that include filter changes and operational checks can extend fan lifespan from 3-5 years to 7-10 years.
Neglecting maintenance may increase energy consumption by up to 34%.
Follow these best practices and check the FAQ for quick solutions. Take charge of your setup and keep your cabinet running smoothly.
FAQ
How often should you clean your cabinet fan?
You should clean your cabinet fan every month. Dust and debris can build up quickly. Regular cleaning keeps airflow strong and protects your equipment from overheating.
What is the best way to reduce fan noise?
You can choose a fan with a low dBA rating. Install rubber grommets or vibration dampers. Place the fan on a solid surface. Keep the fan clean to prevent extra noise from dust buildup.
Can you install a cabinet fan yourself?
Yes, you can install a cabinet fan with basic tools. Follow the manufacturer’s instructions. Always turn off the power before starting. If you feel unsure, ask a professional for help.
How do you know if your cabinet fan is working properly?
Check for steady airflow at the exhaust vent. Listen for smooth, quiet operation. Watch for warning lights or error codes. If you notice heat or noise, inspect the fan right away.
Do you need a filter for your cabinet fan?
A filter helps keep dust and particles out of your cabinet. You should use a filter if your environment is dusty or if you want to protect sensitive equipment. Clean or replace the filter regularly for best results.
See Also
Choosing The Ideal Outdoor Electrical Cabinet For You
Selecting The Most Effective Cooling Solution For ESTEL Cabinets
Guide To Installing And Maintaining Smoke Detectors In Cabinets
Enhancing Outdoor Cabinets Through Power, Cooling, And Monitoring
Advice On Selecting Communication Cabinets For Tropical Environments
CALL US DIRECTLY
86-13752765943
3A-8, SHUIWAN 1979 SQUARE (PHASE II), NO.111, TAIZI ROAD,SHUIWAN COMMUNITY, ZHAOSHANG STREET, NANSHAN DISTRICT, SHENZHEN, GUANGDONG, CHINA