How to Install Outdoor Cabinet Heat Exchangers for Reliable Cooling

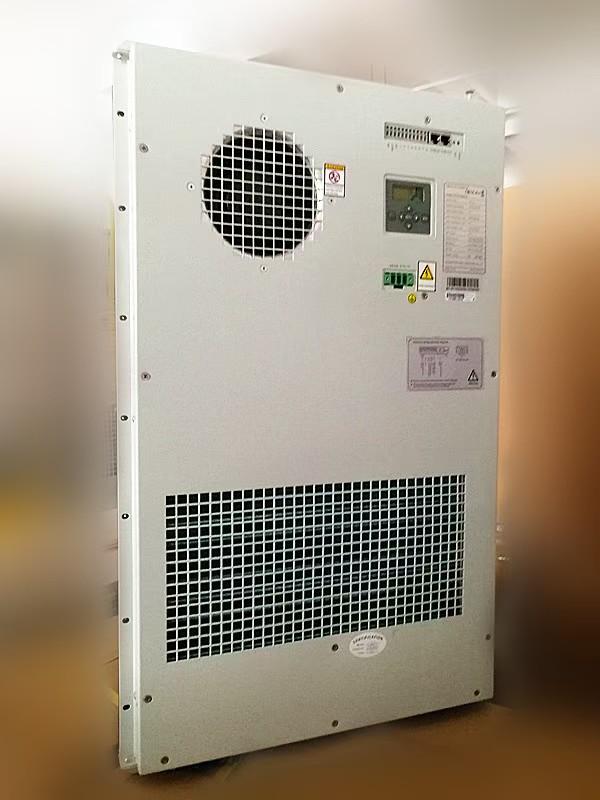
Installing an outdoor cabinet heat exchanger gives you reliable cooling outside, even when the weather is bad. You can count on these climate control solutions because the design and materials are important. For example, an air-to-air exchanger with a 45° air inlet angle and materials like aluminum or stainless steel stops rust and keeps water out. If you keep your exchanger clean and sealed well, it can work at its best energy level, with some models reaching an EER of 25.5 at 11 liters per second airflow. Outdoor climate control solutions work best when you follow the maker’s instructions and plan for regular checkups. You can do this job if you follow the right steps and pay close attention.
Key Takeaways
Read the manual closely before you start to make sure you set it up safely and correctly.
Pick the right size and type for your heat exchanger so your equipment stays cool and uses less energy.
Put the unit on a flat and steady surface. Make sure there is enough space around it for air to move and for easy cleaning.
Seal the cabinet tightly and set up good drainage. This helps keep out water, dust, and bugs.
Clean and check your heat exchanger often. This helps it work well and stops expensive repairs.
Preparation
Read the Manual
Begin by reading the user manual and all instructions. The manual tells you how to mount the heat exchanger. It also shows how to connect power and seal the cabinet. You will learn about the right voltage and current. The manual explains grounding steps too. It teaches you how to keep the outdoor cabinet sealed. This keeps out dust and water. If you follow these steps, you avoid mistakes. This helps your exchanger work safely.
Site Assessment
Look at the place where you want to put the outdoor cabinet. Make sure the ground is flat and strong. The cabinet should not shake or lean. Put the cabinet where there is enough space around it. This space lets air move and helps with future repairs. Check for things that could block airflow or make it too hot. Plan so you can reach the exchanger for cleaning or fixing. Try to keep the cabinet out of direct sunlight. This stops extra heat from building up.
Tip: Leave space around the cabinet for air and service. This helps the exchanger work well and makes repairs safer.
Tools and Safety
Get all your tools ready before you begin. Use screwdrivers, wrenches, and pliers with insulation. Check your tools to make sure they are not broken. Wear gloves and goggles to protect yourself. Always ground the cabinet to stop electrical shocks. Use hardware that can handle outdoor weather. Follow local rules and get any needed permits. When you finish, test the exchanger to check if it works. Clean the cabinet inside and outside to remove dust. Cleaning often keeps your outdoor exchanger safe and working well.
Outdoor Cabinet Heat Exchanger Selection
Sizing and Heat Load
You must pick an outdoor cabinet heat exchanger with enough cooling power. First, look at your cabinet’s size and shape. Think about how much heat comes from the electronics inside. Sunlight on the cabinet also adds heat. If your exchanger is too small, your equipment will get too hot. If it is too big, it wastes energy and does not control humidity well. HVAC experts use special software to find the right cooling load. They check insulation, sun, and how much heat your devices make.
Metric | Description | Application | Industry Standard |
|---|---|---|---|
EER | Cooling output vs. electric input at fixed conditions | Compare AC systems | Used for rating |
SEER | Average EER over a season | Estimate running costs | SEER 13+ required in USA |
IEER | Weighted EER at different loads | Commercial/industrial systems | AHRI Standard 210/240 |
HSPF | Heating efficiency for heat pumps | Heat pump rating | HSPF 8.5+ for ENERGY STAR |
Getting a higher SEER unit can save a lot of energy. For example, if you go from SEER 10 to SEER 25, you can save up to 60% energy. This makes your climate control solutions work better and cost less.
Environmental Factors
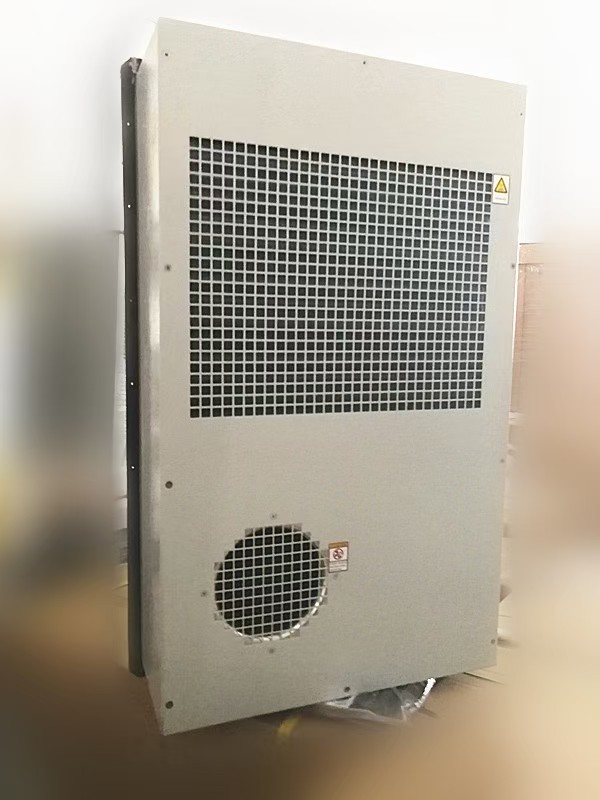
You need to think about the weather where you put your enclosure heat exchanger. Outdoor cabinets face rain, snow, sun, and big temperature changes. Pick exchangers made from stainless steel or aluminum to stop rust. Make sure the cabinet seals tight to keep out water, dirt, and bugs.
Check the hottest and coldest temperatures in your area.
Keep humidity under 60% to stop water drops inside.
Watch for extra heat from machines or sunlight.
Use enclosures made for outdoors, like NEMA 4 or 4X.
Make sure there is enough airflow and pressure for good cooling.
If your cabinet is small or gets very hot, try hybrid cooling. These use both air and liquid to cool better.
Product Features
Look for features that help your system work well and last long. Many outdoor cabinet air conditioners and heat exchangers keep the inside within 5°F of the outside, even with lots of heat. Closed-loop designs keep dust and water out of your equipment. Some exchangers use heat pipes or impingement cooling to move heat fast. Liquid-to-air exchangers are good for high-power setups.
Tip: Pick an enclosure heat exchanger with high energy efficiency. This saves money on bills and cuts down on repairs.
Outdoor cabinet air conditioners and top cooling solutions may cost more at first. But they save money over time. They use less energy and need less fixing. These climate control solutions work well outside, keeping your equipment safe and cool.
Outdoor Installation Steps
Mounting Methods
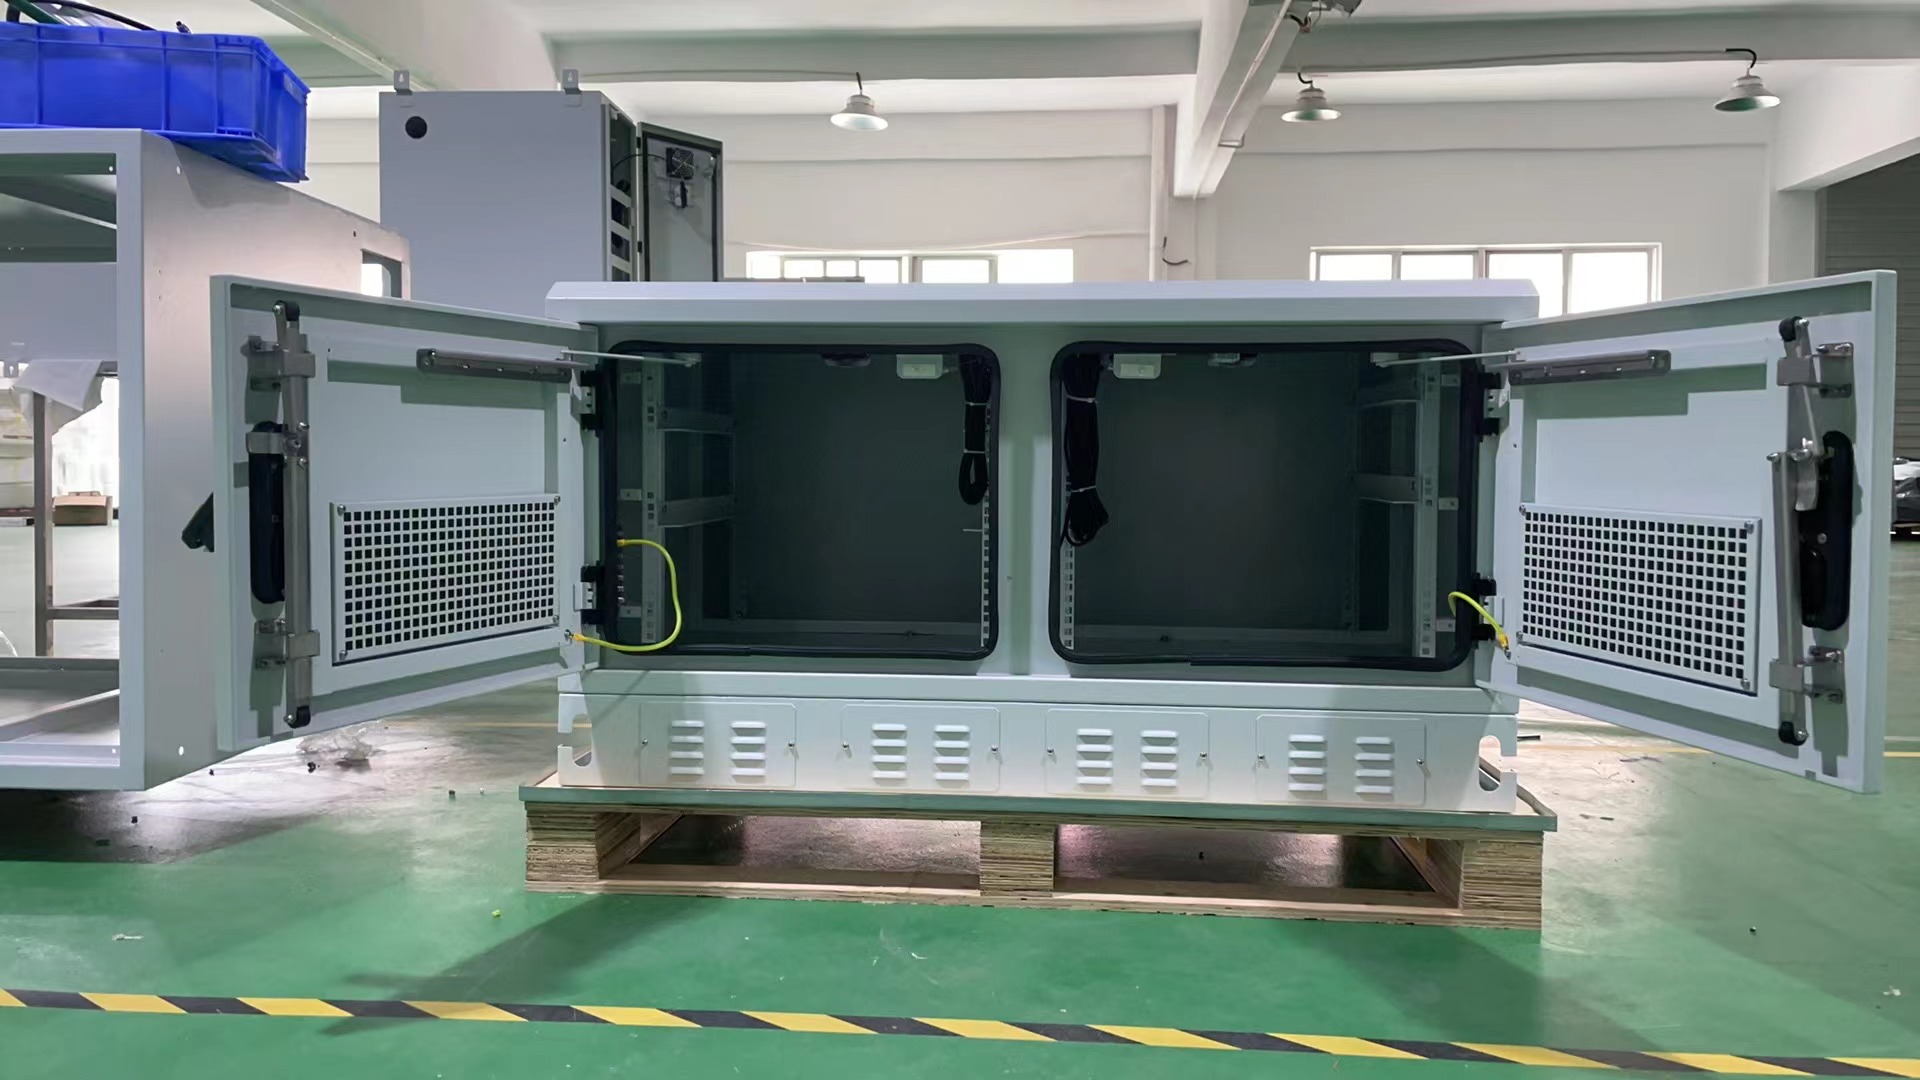
You need to mount your outdoor cabinet heat exchanger in a way that keeps it stable and safe. Start by checking the mounting surface. It should be flat and strong enough to hold the weight of the exchanger. Use the mounting brackets or hardware that come with your unit. Many outdoor models use a semi-embedded method. This means part of the exchanger sits inside the cabinet, while the rest stays outside. This setup helps with airflow and makes maintenance easier.
Make sure you can reach the exchanger for cleaning and repairs. Leave enough space around the unit for air to move. Secure all bolts and screws tightly. If the cabinet sits on a concrete pad, check that it does not wobble. A stable base keeps the outdoor cabinet heat exchanger working well, even in windy or rainy weather.
Tip: Always follow the manufacturer’s mounting instructions. This helps you avoid damage and keeps your warranty valid.
Electrical Connections
You must connect the power supply to your outdoor cabinet heat exchanger safely. Check the voltage and current ratings in the manual. Use wires and connectors that match these ratings. Proper electrical connections keep your equipment safe and help it last longer.
Use enclosures with the right NEMA rating for your location. For outdoor use, NEMA 3 or higher protects against rain, dust, and ice.
Follow standards like NFPA 79 for insulation and labeling. This keeps wires safe and easy to identify.
Use ANSI Z535 safety signs to warn about electrical hazards.
Make sure your panel meets UL 508A standards to prevent fire or shock.
Check the IP rating if you need extra protection from water or dust.
Lock the cabinet to stop people from tampering with the wires. Always ground the system to prevent shocks. If you do not feel sure about wiring, ask a licensed electrician for help.
Note: Good electrical connections and the right enclosure rating reduce the risk of failure and keep your outdoor system running smoothly.
Sealing and Drainage
You need to seal your outdoor cabinet heat exchanger to keep out water, dust, and bugs. Use weatherproof gaskets around all openings. Check that the door closes tightly. Seal any cable entry points with approved fittings.
Slant the bottom of the cabinet slightly. This helps water drain away instead of pooling inside. Some exchangers have built-in drains. Make sure these stay clear of dirt and leaves. Good drainage stops rust and keeps the inside dry.
Use stainless steel or aluminum parts for better weather resistance.
Inspect seals after storms or cleaning.
Replace worn gaskets right away.
Tip: A well-sealed cabinet protects your equipment and helps the heat exchanger work at its best.
Initial Testing
After you finish installation, test your outdoor cabinet heat exchanger before putting it into full use. Turn on the power and listen for any strange noises. Check that fans and controls work as expected. Feel the airflow to make sure it moves freely in and out of the cabinet.
Watch for leaks around seals and drains. Use a thermometer to check the temperature inside the cabinet. The exchanger should keep the inside cool, even when the sun shines on the cabinet. If you see any problems, turn off the power and fix them before running the system again.
Note: Always follow the manufacturer’s testing steps. Careful testing at the start helps you avoid bigger problems later.
Checks and Troubleshooting
Operation Verification
After you install your outdoor cabinet heat exchanger, you need to check if it works right. Turn on the system and watch how it runs. Listen for odd sounds from the fans or motors. Put your hand by the vents. Air should move in and out easily.
You should also look at some important reliability numbers and test results:
Failure rates from special libraries help you find weak parts.
Use Failure Mode Effects and Criticality Assessment (FMECA) to see which parts need more care.
Reliability Centered Maintenance (RCM) helps you plan when to check or fix things. For less important parts, you can wait until they break. For key parts, check them often or use special tools to predict problems.
Integrity Operating Windows (IOWs) show safe temperature, pressure, and flow. Stay in these safe ranges to keep your exchanger working well.
Changing fan speed or blade angle can save energy and make less noise.
Thermal performance testing is important too. Use heat transfer analysis to see if your exchanger keeps the cabinet cool. Check if the real temperature is much different from what you expect. If there is a problem, look for sensor mistakes or blocked airflow.
Tip: Always compare your test results to what the manufacturer says is normal. This helps you find problems early and keep your system working well.
Common Issues
You might have some common problems with your outdoor cabinet heat exchanger. Here are some to watch for:
Issue | What to Check | Solution |
|---|---|---|
Weak airflow | Blocked vents, dirty filters | Clean or replace filters |
High temperature | Fan failure, poor sealing | Fix fan, check gaskets |
Water inside cabinet | Bad drainage, loose seals | Clear drains, reseal openings |
High energy use | Dirty coils, wrong fan speed | Clean coils, adjust settings |
Noise or vibration | Loose parts, worn bearings | Tighten bolts, replace parts |
If you see any of these problems, fix them fast. Clean the exchanger and check all seals. Make sure fans and motors work well. Keeping your system clean and checking it often saves energy and helps it work better. Regular checks stop bigger problems and keep your equipment safe outside.
Enclosure Heat Exchanger Maintenance
Routine Cleaning
Check your enclosure heat exchanger often to keep it working well. Dust, leaves, and dirt can block the fans and tubes. If this happens, heat cannot leave the cabinet. Use a soft brush or a vacuum to clean the fans and tubes. Remove any trash from around the cabinet outside. Look for rust or damage on the unit. Clean both the inside and outside surfaces to keep high efficiency. If you see worn gaskets or seals, change them right away. Cleaning often helps stop bigger problems and saves energy.
Tip: Set a reminder to clean your enclosure heat exchanger every few months. Clean more often if your outdoor area has lots of dust or pollen.
Performance Monitoring
Watch how your enclosure heat exchanger works over time. Use sensors to check temperatures, pressures, and flow rates. Compare these numbers to the targets in your manual. Many systems use energy key performance indicators like U-factor and approach temperature. These numbers show how well your exchanger moves heat. If you see lower efficiency, it may be time for service.
Engineers use special software to check if your exchanger meets the manufacturer's goals. They look at trends and use graphs to spot changes. Some advanced systems use machine learning to guess when you need maintenance. This helps you avoid breakdowns and keeps energy use low. Regular checks help you find ways to improve and save money.
Easy Access for Service
Plan for easy access when you install your enclosure heat exchanger. Leave enough space around the cabinet so you can reach all parts. This makes cleaning and repairs much faster. Use doors or panels that open wide. Mark service points clearly. Good access helps you keep the exchanger in top shape and supports long-term efficiency.
Note: If you make service easy, you spend less time on repairs and more time enjoying reliable cooling.
Installation Checklist
You want your enclosure heat exchanger to work well and last a long time. Use this checklist to make sure you do not miss any important steps during installation. Follow each step carefully for the best results.
Read the Manual
Check the manufacturer's instructions before you start. Make sure you understand all safety warnings.Inspect the Site
Look at the outdoor area. The ground should be flat and strong. Make sure nothing blocks airflow.Gather Tools and Safety Gear
Collect all needed tools. Wear gloves and safety glasses.Check the Enclosure Heat Exchanger
Inspect the unit for damage. Confirm you have all parts.Mount the Unit
Use the right brackets and hardware. Secure the enclosure heat exchanger so it does not move.Connect Electrical Power
Match the voltage and current to the manual. Ground the system to prevent shocks.Seal and Weatherproof
Add gaskets and seal all openings. Make sure the cabinet is ready for outdoor weather.Set Up Drainage
Tilt the cabinet if needed. Clear any drains so water can flow out.Test the System
Turn on the power. Listen for strange sounds. Check airflow and temperature.Plan for Maintenance
Leave space around the unit. Make sure you can reach it for cleaning and repairs.
Tip: Use this checklist every time you install an enclosure heat exchanger. It helps you avoid mistakes and keeps your equipment safe.
Step | Complete? |
|---|---|
Manual Read | ☐ |
Site Inspected | ☐ |
Tools Ready | ☐ |
Unit Checked | ☐ |
Mounted | ☐ |
Power Connected | ☐ |
Sealed | ☐ |
Drainage Set | ☐ |
Tested | ☐ |
Maintenance Planned | ☐ |
You can keep things cool if you use the right climate control solutions. First, get ready and pick the best outdoor heat exchanger for your needs. Always follow the checklist and read the manufacturer’s instructions. Take care of your system often so it keeps working well. When you do these things, your equipment stays safe and you do not have to worry.
FAQ
How often should you clean your outdoor cabinet heat exchanger?
You should clean your heat exchanger every three to six months. If you see dust, leaves, or pollen building up, clean it sooner. Regular cleaning helps your system work better and last longer.
What should you do if the heat exchanger is not cooling properly?
First, check for blocked vents or dirty filters. Clean them if needed. Make sure the fans work and the seals are tight. If problems continue, contact a professional for help.
Can you install an outdoor cabinet heat exchanger by yourself?
You can install it if you follow the manual and use the right tools. Always follow safety rules. If you feel unsure about electrical work, ask a licensed electrician for help.
What materials work best for outdoor cabinet heat exchangers?
Stainless steel and aluminum work best. These materials resist rust and weather damage. They help your heat exchanger last longer outside.
See Also
Enhancing Outdoor Cabinet Performance With Power And Cooling
Guidelines For Setting Up ESTEL Cabinets In Tough Environments
Reliable Outdoor Cabinets Featuring Effective Cooling Systems
Constructing Durable Outdoor Communication Cabinets For Any Climate
CALL US DIRECTLY
86-13752765943
3A-8, SHUIWAN 1979 SQUARE (PHASE II), NO.111, TAIZI ROAD,SHUIWAN COMMUNITY, ZHAOSHANG STREET, NANSHAN DISTRICT, SHENZHEN, GUANGDONG, CHINA