ESTEL's Tips and Tricks for Proper PV Panel Wiring
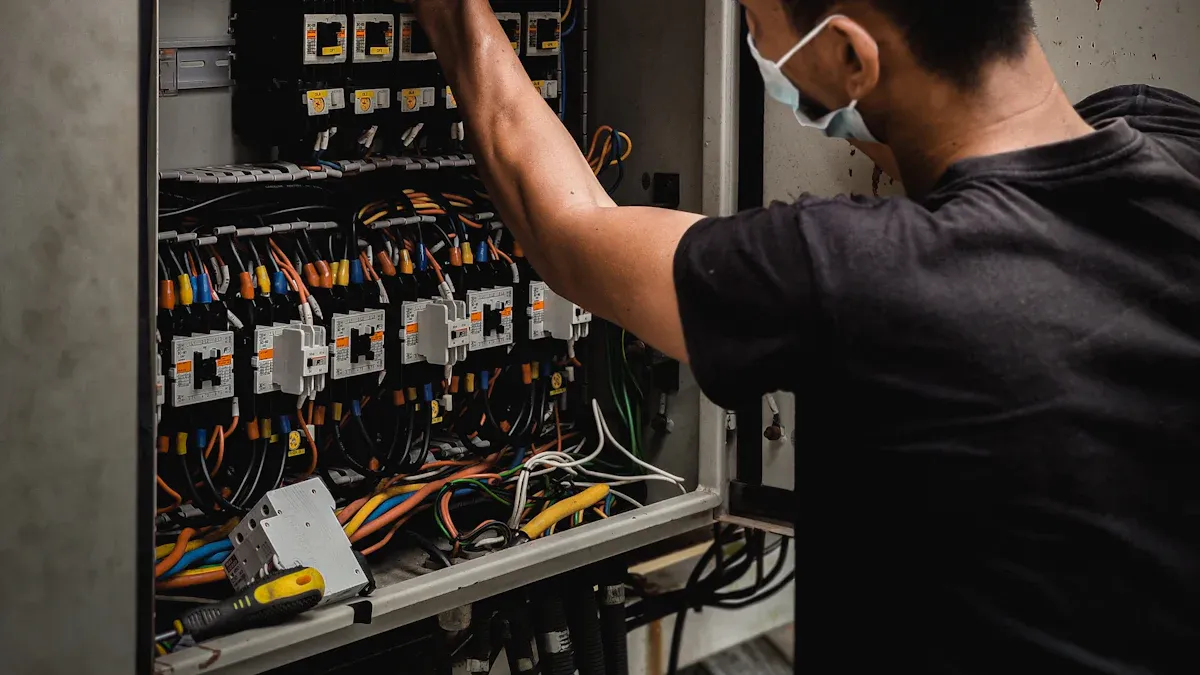
Proper PV panel wiring plays a critical role in ensuring your solar energy system operates efficiently and safely. Faulty wiring can lead to risks like electrical shocks or fires. Firefighters also face dangers from live components during emergencies, which proper wiring can help mitigate. To comply with the National Electric Code (NEC), you must ensure visible and accessible AC and DC disconnects for safe system shutdowns. This guide will simplify the wiring process, helping you meet safety standards while optimizing your system's performance.
Key Takeaways
Good wiring keeps your solar system safe and working well. It stops dangers like shocks or fires.
Knowing voltage, current, and power helps pick the right wires. This makes your solar panels work their best.
Right tools and materials make wiring easier. Important tools are wire cutters, testers, and tape for covering wires.
Wiring plans are important for safety rules. They show correct connections and spot problems before setup.
Checking your solar wiring often keeps it working longer. Do this every season to keep it running great.
Key Concepts and Tools for Solar Panel Wiring
Understanding Voltage, Current, and Power in Solar Panels
When wiring your solar panel array, understanding voltage, current, and power is essential. These three concepts define how energy flows through your photovoltaic system.
Voltage (V) measures the electric potential difference. For example, connecting two 20-volt panels in series results in a total of 40 volts.
Current (I) represents the rate of charge flow, measured in amps. In series configurations, the current remains constant.
Power (P) is the rate of energy transfer, calculated as P = V * I. For instance, two 10-watt panels wired in parallel deliver 20 watts.
Term | Definition | Numerical Example |
|---|---|---|
Voltage | The electric potential difference, measured in volts (V). | Two 20-volt panels in series yield 40 volts total. |
Current | The rate of charge flow, measured in amps (A). | Current remains the same when panels are in series. |
Power | The rate of energy transfer, calculated as P = V * I, measured in watts (W). | Two 10-watt panels in parallel yield 20 watts total. |
These concepts help you choose the right wiring configurations for your pv system, ensuring optimal performance.
Essential Tools and Materials for Wiring Your Solar Panel Array
Having the right tools and materials simplifies solar panel electrical wiring. Industry standards recommend the following:
Wrenches and screwdrivers
Tape measure and level
Lifting equipment and specialized panel clamps
Ratchets, sockets, wire strippers, and cutters
Crimping tools and multimeters
AC/DC clamp meter and DC high voltage probe
These tools ensure precision and safety when wiring your solar panel array. For example, a multimeter helps you measure voltage and current accurately, while wire strippers prevent damage to cables during installation.
Importance of Solar Panel Wiring Diagrams
Solar panel wiring diagrams are vital for proper installation practices. They provide a clear roadmap for connecting components in your photovoltaic systems.
Compliance with Local Codes: Wiring diagrams ensure your pv system meets local electrical safety standards.
Safety Assurance: They help you size and connect components correctly, reducing electrical hazards.
System Efficiency: Diagrams identify inefficiencies or design flaws before installation, optimizing performance.
Using solar panel connection diagrams minimizes errors and ensures your wiring basics align with industry standards. Whether you're working on simple wiring configurations or complex setups, these diagrams are indispensable.
Types of Connections for Wiring Your Solar Panel Array
Series Connections: How They Work and When to Use Them
When connecting solar panels in series, you link the positive terminal of one panel to the negative terminal of the next. This configuration increases the total voltage while keeping the current constant. For example, if you connect two 20-volt panels with a current of 5 amps each, the system will produce 40 volts at 5 amps.
Series connections are ideal when you need to increase the voltage to match the input requirements of your inverter or charge controller. However, this setup has a limitation: the current is restricted by the weakest panel in the series. If one panel underperforms due to shading or damage, the entire array's output suffers. Studies show that mismatched current in series connections can reduce total power output to 177.93 watts compared to 191.88 watts in a matched configuration.
Tip: Avoid shading on any panel in a series connection. Even a single shaded panel can compromise the performance of the entire array.
This configuration works best in open areas with consistent sunlight and minimal shading. It’s a common choice for residential systems where higher voltage is required to reduce energy loss over long cable runs.
Parallel Connections: How They Work and When to Use Them
In parallel connections, you connect all the positive terminals together and all the negative terminals together. This setup keeps the voltage constant while increasing the total current. For instance, if you connect two 20-volt panels with a current of 5 amps each, the system will produce 20 volts at 10 amps.
Parallel connections are beneficial when you need to maintain a low voltage while increasing the current to meet your system's energy demands. This configuration is less affected by shading compared to series connections. If one panel is shaded, it won’t significantly impact the performance of the others. However, all panels in a parallel connection must have the same voltage rating to ensure proper operation.
Advantage/Limitations | Description |
|---|---|
Efficient Power Generation | Microinverters enhance efficiency and stability in parallel configurations. |
Minimal Impact on System Efficiency | Shading on one panel has little effect on the overall system. |
Independent MPPT Function | Each panel operates independently, ideal for varying conditions. |
Parallel connections are suitable for systems with panels installed on multi-directional roofs or in areas with partial shading. They also work well in setups where microinverters are used to optimize individual panel performance.
Wiring Solar Panels in Series-Parallel: Benefits and Applications
Series-parallel connections combine the advantages of both series and parallel configurations. In this setup, you group panels into smaller series strings and then connect those strings in parallel. This approach balances voltage and current, making it a versatile option for larger systems.
For example, if you have four 20-volt panels with a current of 5 amps each, you can connect two panels in series to create two 40-volt strings. Then, you connect these strings in parallel to achieve a system output of 40 volts at 10 amps. This configuration provides flexibility in meeting both voltage and current requirements.
Feature | Solar Roof Tiles (SRTs) | Traditional PV Systems |
|---|---|---|
Hotspot Resistance | Yes | No |
Effect of Bypass Diode Failure | Minimal impact | Significant impact |
Energy Loss under Environmental Stress | 1.73% | Infinite resistance |
Annual Clean Energy Generation | 1871.72 kWh | N/A |
GHG Emissions Mitigated | 335.7 kgCO2 equivalent | N/A |
Lifetime CO2 Mitigation | 8392.5 kgCO2 equivalent | N/A |
Series-parallel connections are particularly useful in large-scale installations, such as commercial or industrial solar farms. They offer a balance between efficiency and reliability, ensuring the system performs well under varying environmental conditions.
Note: Proper planning and a detailed wiring diagram are essential when designing series-parallel connections. This ensures compatibility between components and prevents power loss.
By understanding these three types of connections, you can choose the best configuration for your solar panel system. Whether you’re connecting solar panels in series, parallel, or a series-parallel combination, the right setup will maximize efficiency and meet your energy needs.
Step-by-Step Guide for PV Panel Wiring
Preparing Your Workspace and Gathering Tools
Before you begin wiring solar panels, preparing your workspace is crucial for a smooth and safe installation process. Start by choosing a clean, dry area with ample space to lay out your tools and materials. Ensure the workspace is free from clutter and hazards that could interfere with the wiring process.
Gather all the necessary tools and materials to avoid interruptions during installation. You’ll need:
Solar panels: Ensure they are clean and free of debris.
Wiring materials: Include MC4 connectors, compatible wires, and insulation tape.
Tools: Use wire cutters, strippers, crimping tools, and a voltage tester.
Safety gear: Wear gloves and goggles to protect yourself from electrical hazards.
Place your solar panels in direct sunlight at the correct angle to maximize energy capture. Organize your tools within easy reach to streamline the process. A well-prepared workspace reduces errors and ensures a safer installation.
Tip: Double-check your tools and materials before starting. Missing items can delay your progress and compromise the quality of your installation.
Step-by-Step Instructions for Wiring Panels in Series
Wiring solar panels in series increases the voltage while keeping the current constant. Follow these steps to learn how to wire solar panels in series effectively:
Gather the materials: Collect solar panels, MC4 connectors, compatible wires, insulation tape, wire cutters, and a voltage tester.
Install the solar panels: Position the panels in direct sunlight at the optimal angle for energy capture.
Identify the terminals: Locate the positive and negative terminals on each panel.
Connect the panels: Link the positive terminal of one panel to the negative terminal of the next. Repeat this process for all panels in the series.
Secure the connections: Wrap insulation tape around each connection to protect against moisture and damage.
Connect to the system: Attach the first panel’s positive terminal to the charge controller or inverter. Connect the last panel’s negative terminal to complete the circuit.
Test the output: Use a voltage tester to verify the total voltage of the series configuration.
Finalize the installation: Secure all wires and connections to prevent movement or damage.
Note: When wiring solar panels in series, ensure all panels have the same current rating to avoid performance issues.
This method is ideal for systems requiring higher voltage, such as those connected to 24V batteries. If you’re wondering how to wire 12V solar panels to 24V batteries, series wiring is the solution.
Step-by-Step Instructions for Wiring Panels in Parallel
Wiring solar panels in parallel keeps the voltage constant while increasing the current. This configuration is perfect for systems with varying sunlight conditions. Here’s how to wire solar panels in parallel:
Connect all positives together: Use a single wire to link the positive terminals of all panels.
Connect all negatives together: Do the same for the negative terminals, connecting them to another wire.
Maintain voltage consistency: Ensure the voltage remains constant across all panels. For example, if each panel produces 20 volts, the total voltage will stay at 20 volts.
Increase amperage: Add up the current from each panel. If each panel generates 7.25 amps, the total current will equal the sum of all panels.
Minimize shading impact: Parallel wiring ensures that shading on one panel won’t affect the performance of the others.
Test the system: Use a multimeter to confirm the voltage and current output.
Secure the connections: Insulate and organize the wires to prevent damage or interference.
Parallel wiring is ideal for systems with panels installed on multi-directional roofs or in areas with partial shading. If you’re exploring how to wire solar panels in parallel, this method ensures reliable performance even under challenging conditions.
Tip: Use microinverters with parallel wiring to optimize individual panel performance and enhance system efficiency.
By following these steps, you can wire a solar panel to a battery effectively, ensuring your system meets energy demands.
Step-by-Step Instructions for Wiring Solar Panels in Series-Parallel
Wiring solar panels in series-parallel combines the benefits of both series and parallel configurations. This setup balances voltage and current, making it ideal for larger systems or installations requiring flexibility. Follow these steps to wire your solar panels in series-parallel effectively:
Plan Your Configuration
Begin by determining the number of panels and their specifications. Group the panels into smaller series strings, ensuring each string has the same voltage rating. For example, if you have eight panels, divide them into two groups of four panels wired in series.Gather Your Tools and Materials
Collect the necessary tools, including wire cutters, strippers, crimping tools, and a multimeter. Use MC4 connectors and UV-resistant wires to ensure durability. Prepare insulation tape to secure connections.Wire Panels in Series
Start by wiring solar panels in series within each group. Connect the positive terminal of one panel to the negative terminal of the next. Repeat this process until all panels in the group are connected. This step increases the voltage while keeping the current constant.Connect Series Strings in Parallel
Once the series strings are complete, connect them in parallel. Use a single wire to link the positive terminals of all strings together. Do the same for the negative terminals. This step increases the total current while maintaining the voltage.Test the Output
Use a multimeter to measure the voltage and current of the system. Verify that the output matches your calculations. For example, if each series string produces 40 volts at 5 amps, the parallel connection should yield 40 volts at 10 amps.Secure and Insulate Connections
Wrap insulation tape around all connections to protect them from moisture and damage. Organize the wires neatly to prevent tangling or interference.Connect to the Charge Controller or Inverter
Attach the positive and negative terminals of the system to the charge controller or inverter. Ensure compatibility between the system's output and the input requirements of your equipment.
Tip: Double-check all connections before finalizing the installation. A loose or incorrect connection can lead to power loss or system inefficiency.
By following these steps, you can successfully complete wiring solar panels in series-parallel. This configuration provides a balanced approach to meet both voltage and current requirements, making it suitable for residential and commercial installations.
Safety Guidelines and Wiring Requirements for Solar Panels
Disconnecting Power Sources Before Starting
Before wiring solar panels, disconnecting all power sources is essential for your safety. This step prevents accidental shocks and ensures a secure working environment. The National Electrical Code (NEC) has emphasized the importance of disconnects in photovoltaic (PV) systems since 1984. Disconnects allow you to isolate parts of the circuit during installation or maintenance, reducing risks.
Key Point | Description |
|---|---|
NEC Involvement | The National Electrical Code (NEC) first addressed disconnects in PV systems in its 1984 edition. |
Disconnects are essential for safely separating portions of a circuit during maintenance and installation. | |
Variety of Configurations | Disconnects come in various forms, ensuring flexibility in installation and compliance with safety standards. |
When working on solar panel wiring, always verify that the system is completely de-energized. Use a voltage tester to confirm no current flows through the circuit. This precaution protects you and ensures compliance with wiring requirements for solar panels.
Using Proper Insulation, Connectors, and UV-Resistant Wires
Proper insulation, connectors, and UV-resistant wires are critical for a durable and efficient solar installation. Cracked insulation or water ingress can lead to short circuits and corrosion, while poor-quality connectors may cause loose connections.
Failure Mode | Real-World Impact | Celestix Solution |
|---|---|---|
Cracked insulation | Exposure to heat cycles & UV | XLPE/TPE materials, tested for UV aging |
Water ingress | Corrosion, short circuits | IP67/IP68 overmolded junctions |
Voltage drop | Energy loss, reduced efficiency | Correct conductor sizing, Hi-Pot tested |
Connector failure | Mismatched, loose connections | Pre-mated, torque-tested connectors |
Mechanical fatigue | Wire breakage from movement | Flexible routing, strain relief designs |
Choose high-quality materials like UV-resistant wires and pre-mated connectors to avoid these issues. These components ensure your system remains efficient and safe over time. Always inspect wires and connectors for damage before installation.
Avoiding Overloading and Ensuring Compatibility
Overloading your solar system can lead to overheating and damage. To avoid this, calculate the total current and voltage of your system and ensure they match the capacity of your charge controller and inverter. For example, if your panels produce 40 volts at 10 amps, your equipment must handle at least this output.
Compatibility between components is equally important. Use wiring diagrams to confirm that all parts of your system work together seamlessly. Mismatched components can reduce efficiency and increase the risk of failure. Regularly inspect your system to identify and address potential issues early.
Tip: Always follow the manufacturer’s specifications for your equipment to ensure safe and efficient operation.
Regular Maintenance and Inspection Tips
Regular maintenance and inspections keep your solar panels operating efficiently and extend their lifespan. By following a seasonal schedule, you can address potential issues before they escalate. Here’s a simple guide to help you maintain your system throughout the year:
Spring (March-May): Clean your panels to remove dirt and debris accumulated during winter. Inspect for damage caused by snow or ice. Check all electrical connections and trim any vegetation that might cast shadows on your panels.
Summer (June-August): Monitor your system’s performance regularly. Ensure the inverter has proper ventilation to prevent overheating. Clean the panels again if you notice a drop in energy output.
Fall (September-November): Clear leaves and debris from the panels and nearby gutters. Inspect the roofing area around the panels for any signs of wear or damage.
Winter (December-February): Remove snow from the panels to maximize sunlight absorption. Monitor the system closely for any performance issues and plan for a thorough inspection in spring.
"The more direct sunlight solar panels can absorb, the more energy they create. Dirt, debris, snow, and even bird droppings can build up on your panels and block sunlight. The National Renewable Energy Laboratory reported that dirty solar panels lose up to 25 percent efficiency."
In addition to seasonal tasks, perform a visual inspection of your system every few months. Look for loose wires, cracked insulation, or damaged connectors. Use a soft brush or a hose with low pressure to clean the panels. Avoid abrasive materials that could scratch the surface.
By staying proactive with maintenance, you ensure your solar panels operate at peak efficiency. A clean and well-maintained system not only generates more energy but also saves you money in the long run.
Professional Tips for Optimizing Your Solar Panel Wiring
Choosing the Right Wire Gauge for Your System
Selecting the correct wire gauge is crucial for efficient and safe solar panel wiring. The wire gauge determines the amount of current the wire can handle and affects voltage drop. Using a wire that is too thin can lead to overheating and energy loss. To choose the right gauge, consider the distance between your panels and the inverter, as well as the current your system generates.
Here’s a quick reference table to help you understand how wire gauge impacts voltage drop:
Wire Gauge | Voltage Drop (Volts) | Percentage Drop (%) |
|---|---|---|
12 AWG | 3.85 | 3.21 |
10 AWG | 2.42 | 2.02 |
For longer distances, opt for a lower gauge (thicker wire) to minimize energy loss. Always check your system’s specifications and consult local electrical codes to ensure compliance.
Tip: Use wires with insulation rated for outdoor use to protect against weather and UV exposure.
Minimizing Voltage Drop in Long Cable Runs
Voltage drop occurs when electricity travels through a conductor, losing energy due to resistance. This can reduce the efficiency of your solar system, especially in long cable runs. You can minimize voltage drop by following these steps:
Understand Voltage Drop: Resistance increases with cable length and decreases with thicker cables. Materials like copper have lower resistance compared to aluminum.
Calculate Voltage Drop: Use the formula ( V = I \times R ), where ( V ) is voltage drop, ( I ) is current, and ( R ) is resistance. For example, a 10-amp current over a 50-foot copper wire may result in a 2% drop.
Solve Voltage Drop Issues: Increase the cable diameter or use multiple cables to reduce resistance. Thicker cables are more effective but may cost more.
By addressing voltage drop, you ensure your system delivers maximum power to your home or battery storage.
Note: Keep cable runs as short as possible to further reduce energy loss.
Ensuring Proper Grounding for Safety and Efficiency
Grounding your solar panel system protects against electrical faults and enhances safety. It provides a path for excess electricity to flow into the ground, preventing damage to your equipment and reducing the risk of electrical shock.
To ground your system:
Connect the metal frames of your solar panels to a grounding rod using a copper wire.
Ensure the grounding rod is buried at least 8 feet deep for effective dissipation of electrical surges.
Verify that all connections are secure and meet local electrical codes.
Proper grounding also improves system efficiency by reducing interference from electrical noise. Regularly inspect your grounding system to ensure it remains intact and functional.
Tip: Use corrosion-resistant materials for grounding components to extend their lifespan.
Leveraging ESTEL’s Expertise for Advanced Optimization
Optimizing your solar panel wiring can feel overwhelming, but ESTEL’s expertise simplifies the process. With years of experience in photovoltaic (PV) systems, ESTEL provides advanced solutions to help you achieve maximum efficiency and reliability.
1. Custom Wiring Solutions for Unique Installations
Every solar installation is different. ESTEL offers tailored wiring designs to match your specific needs. Whether you’re working with a residential rooftop or a large-scale solar farm, ESTEL ensures your system operates at peak performance.
Tip: Share your system’s specifications with ESTEL’s team. They can recommend the best wire gauge, connectors, and configurations for your setup.
2. Advanced Tools and Technology
ESTEL equips you with cutting-edge tools to streamline your wiring process. Their solutions include:
Voltage Drop Calculators: Quickly determine the ideal wire size for long cable runs.
Smart Monitoring Systems: Track your system’s performance in real-time to identify inefficiencies.
Pre-Assembled Wiring Kits: Save time with ready-to-use components designed for compatibility.
These tools reduce errors and improve the overall quality of your installation.
3. Expert Guidance and Support
ESTEL’s team of professionals provides step-by-step guidance for complex wiring setups. They also offer training resources to help you understand advanced concepts like series-parallel configurations and grounding techniques.
Note: ESTEL’s customer support is available to troubleshoot issues or answer questions during your installation process.
By leveraging ESTEL’s expertise, you can optimize your solar panel wiring with confidence. Their innovative solutions and personalized support ensure your system delivers maximum energy output while maintaining safety and durability. 🌞
Proper pv panel wiring ensures your solar energy system operates efficiently and safely. You learned how to wire panels in series, parallel, and series-parallel configurations. You also discovered ways to optimize your solar panel wiring, including choosing the right wire gauge and minimizing voltage drop. Applying ESTEL’s tips will help you achieve a successful installation while maximizing energy output.
Start your project with confidence. Follow the steps outlined in this guide to create a reliable and efficient solar system.
FAQ
What is the best way to connect solar panels for maximum efficiency?
The best connection depends on your system's requirements. Use series connections to increase voltage or parallel connections to boost current. For balanced voltage and current, opt for a series-parallel configuration. Always refer to your system's specifications and wiring diagrams for guidance.
How do I prevent voltage drop in long cable runs?
Use thicker wires with a lower gauge number to reduce resistance. Keep cable runs as short as possible. Materials like copper offer better conductivity than aluminum. Calculate voltage drop using the formula ( V = I \times R ) to ensure minimal energy loss.
Can I wire different types of solar panels together?
Avoid wiring panels with different voltage or current ratings. Mismatched panels can lead to inefficiencies and potential damage. If necessary, use a separate charge controller for each panel type to maintain system performance and safety.
What safety precautions should I take during pv panel wiring?
Disconnect all power sources before starting. Wear insulated gloves and goggles. Use UV-resistant wires and proper connectors to prevent damage. Verify all connections with a multimeter before finalizing the installation to ensure safety and efficiency.
How often should I inspect my solar panel wiring?
Inspect your wiring every three to six months. Look for loose connections, cracked insulation, or damaged wires. Clean the panels regularly to maintain efficiency. Seasonal inspections help identify issues early and extend the lifespan of your system.
See Also
Telecom Cabinets Powered By Photovoltaic Energy Storage Systems
Essential Advice for Outdoor Maintenance of ESTEL Cabinets
Selecting and Installing Telecom Cabinets on Poles Safely
Complete Guide for Wiring and Choosing Telecom Cabinet Cables
Ensuring Correct Voltage Levels in ESTEL Communication Cabinets
CALL US DIRECTLY
86-13752765943
3A-8, SHUIWAN 1979 SQUARE (PHASE II), NO.111, TAIZI ROAD,SHUIWAN COMMUNITY, ZHAOSHANG STREET, NANSHAN DISTRICT, SHENZHEN, GUANGDONG, CHINA